

Art-Tech AT-6 Texan Review
Update: This airplane has long been discontinued, and I'm not sure that Art-Tech themselves are still in business.
Original article: For some time I had wanted a 'flaps & retracts' warbird type electric powered plane, but not the run-of-the-mill P-51, Spitfire, Corsair etc. Not that there's anything wrong with any of those legendary warbirds of course, but I just wanted something a bit different.
My attention was drawn to the Art-Tech At-6 Texan (aka Harvard) after reading a rave review in my favourite magazine, RCM&E, and as soon as I'd finished reading it I knew that one going on my shopping list...
The Art-Tech AT-6 Texan is one of many many foamie warbirds out there, but it is a refreshing change from the norm. At 1300mm wingspan it's marginally smaller than the popular FMS/Airfield 1400mm span planes, but still a good enough size to allow for some good scale detailing by Art-Tech.
AT-6: Unboxed
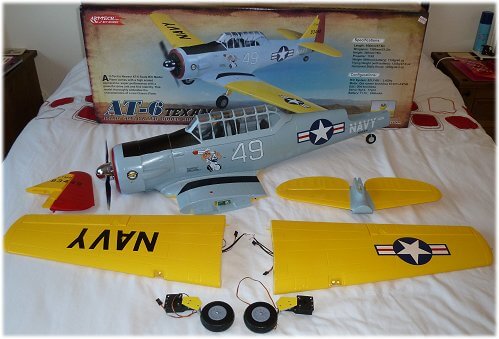
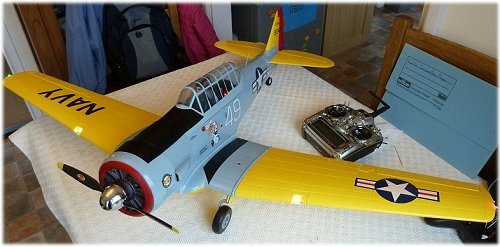
My Texan arrived unscathed, thankfully, and on opening the box I was pleasantly surprised by the finish and appearance of the plane.
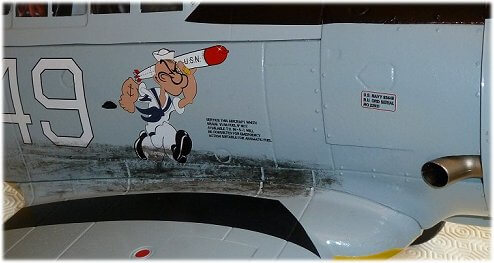
Although available in three different colour schemes, the grey and yellow US Navy scheme is, for me, the most attractive and seems to be the most popular choice.
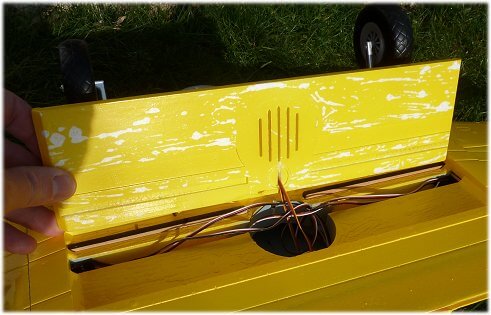
The wing is supplied in three sections - two outer panels and a centre section, all three being joined and strengthened by two wooden spars.
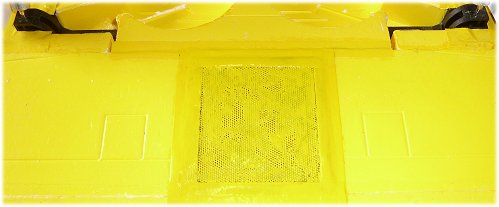
The centre section has a hole and grille cut into it, this is for the optional sound unit speaker.
 Something that is immediately obvious is the amount of wiring coming from the wing panels.
With an aileron and flap servo, plus two lights, to each wing there are plenty of wires to connect up! Fortunately Art-Tech have made this easy by incorporating a small connection board (shown right) into each side of the central panel. Connection of the wires from the board to the Rx is normal.
Scale detailing around the plane is very good, with attention having been paid to inside the cockpit - two instrument panels, an appropriately sized pilot and framework all adding to the effect.
Air intakes and engine exhaust are all present, and the undercarriage has been modelled in a very scale-like way - so much nicer than just bare wire.
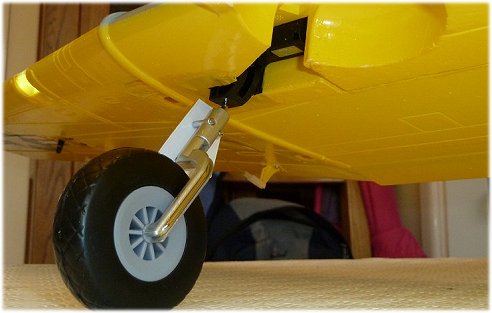
On the subject of the u/c, there are two optional extras for the Art-Tech AT-6; one is a sound module (more on that later) and the other is a set of retracts, to replace the slot-in fixed undercarriage supplied with the plane.
The decision to buy the retracts at the same time I placed the order for the plane was a no-brainer; for just £35 they make all the difference to the scale appearance of the AT-6. They are servo-less (worm-drive) retracts and fit directly into the fixed u/c holes, with no chopping out to be done. The only small mod to do is to make a small groove for the retract leads, up into the underside of the wing.
Panel lines and rivets are nicely moulded on the plane, as are the shapes of the ribs in the tail sections. The decals are bright and crisp, but sadly a couple on my AT-6 had been put on crooked, which spoiled the appearance a bit.
The radial engine is nicely moulded and a scale spinner adds to the overall realism, as do the split flaps.
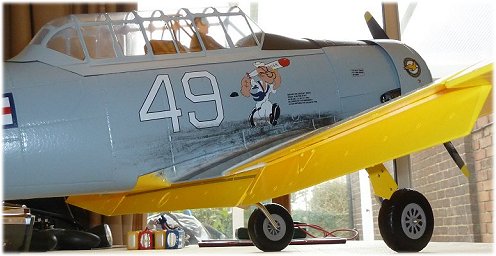
A couple of small details I added myself were to cut out the foot holes into the cockpit and paint them black inside (as purchased, they are just moulded outlines) and add some exhaust residue, this was done with some matt black acrylic paint.
I also painted black the inside of the exhaust port and air intakes.
Art-Tech AT-6 Assembly
In typical foamie rc warbird style, there's really not much to do to get the Art-Tech AT-6 up together.
Two small tubes of rapid epoxy are supplied in the box, but I opened mine only to discover that they had gone off! No biggie, since I had my own to use for gluing the tail feathers to the fuselage which, incidentally, were a very good and snug fit.
As previously mentioned, the optional retracts were easy to fit but the left wheel of mine snagged the edge of the foam cutout when retracted, and so the leg needed to be bent slightly.
The routing of the retract wires was a bit fiddly, but only took ten minutes or so.
The biggest part of the assembly is the wing, and here Art-Tech have included an addendum, which definitely needs a mention!...
It appears that Art-Tech's original intention was to have the wings only screwed in place, and the two wing spars to be dry-slotted into place. The addendum says to glue everything, don't rely on the screws and the tight-fitting spars alone.
Now, these spars are a tight fit - a very tight fit in fact, and because of this I chose not to do any gluing, but instead go with the original idea of keeping all the joints glue-free.
With the spars in place (believe me when I say it's a real effort to slide them fully home into the wings!) and the wing panels screwed in, it all seemed to be a very solid wing - certainly strong enough to handle some warbird type aerobatics.
Oh how wrong I was....
But as it turned out, my decision to not glue the wing panels together was a good one. When I finished assembling the Texan and powered everything up, one aileron servo packed up after a couple of minutes of testing! This annoyed me somewhat, and so I had to pull everything apart again to replace the servo (to be safe I swapped out both aileron servos). What if I'd glued everything together, as per the addendum, and then had it fail?!
With the servos changed, I had to go through it all again, trying hard not to damage the wings while pushing (forcing!) everything into place. Eventually my Art-Tech Texan was ready for flight...
Happy Maiden
With my AT-6 ready for action (JR DSX9 and Spektrum AR6200 Rx used), it was off to the field.
The grass was about an inch long but the plane didn't have any problem getting off the ground, with me doing my best to achieve a nice, scale-like take off.
With retracts safely up I flew some trimming circuits, to find that the plane needed a good few clicks of down trim, but otherwise it was flying well.
I had read about this plane having a nasty stall, so I got some height and brought back the power and held in some up to test the stall. Sure enough, the plane soon dropped a wing badly and went into a spin on stalling - ug. Apparently it's just like the full size, in that respect!
The rest of the flight was uneventful; power was borderline - certainly enough to do those warbird maneuvers, but not too much more in hand.
What I did notice was the lovely tone of sound coming from the plane; a nice, soft sound very pleasant to the ear and a change from the usual brushless motor sound.
Landing the plane took some concentration; with that nasty stall fresh in my mind I was determined not to have that happen close to the ground. I used the flaps and kept the speed up, and my AT-6 touched down with just a small bounce. Phew!
Second Flight near Disaster!
The second flight, on another day, didn't quite go as smoothly, although the plane did survive - just. The reason for that Art-Tech AT-6 addendum suddenly became very clear!...
After a couple of minutes flying, I noticed that the dihedral had increased a bit. Huh? I brought the plane round for a closer look and could see that the central panel of foam on the underside of the central wing section had popped off, and was only being held in place by the taped retract wires!
I quickly came in for what can only be described as an emergency landing, relieved to have my AT-6 on the ground before the wings folded up.
The two wing spars had clearly been pushing on that panel of foam, because of the upward forces on the wings, until the sparse amount of glue holding it in place gave up. Only the four screws holding the wing panels in place had saved the day.
This is just sheer bad design, and I wonder how many Art-Tech AT-6 Texans have been lost by this. The problem is that the wing spars are separate, so if not glued they both push downwards.
The answer is to follow the addendum and glue everything in place (although the spars don't need to be glued into the wing panels - just the centre section), and/or to make up a joiner that connects the spars (i.e. the two separate spars become one).
Whatever you do, don't fly your Art-Tech AT-6 until you've done this!
I've since enjoyed many flights with my Texan since this little mishap; the copious amounts of epoxy I used to glue the spars and speaker panel back together have worked well so far.
Art-Tech AT-6 Texan Sound Unit
As previously mentioned, Art-Tech sell a sound unit as an optional extra for the AT-6. However, at the time, I happened to be the UK reseller for the MrRCSound units and Andrew Lawrence, the developer, had sent me a unit to evaluate (thanks Andrew!). The obvious thing was to fit it in my Texan.
Installation of the unit was quite easy, the speaker naturally went into the hole already cut in the wing for the optional Art-Tech speaker, although a small amount of chopping out was necessary to accommodate the slightly larger speaker case of the MrRCSound unit.
The sound card fitted very nicely in the pilot's footwell, although his legs had to be amputated at the knees!
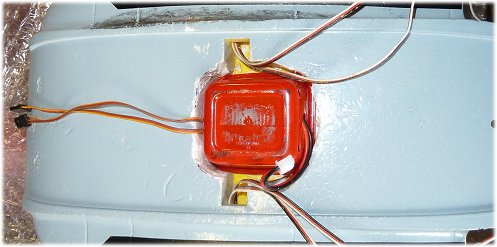
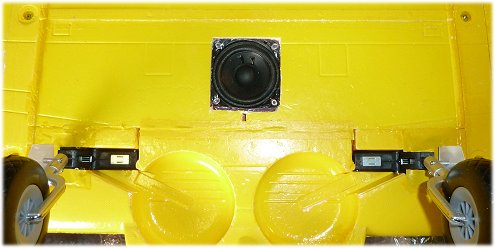

Above: images of the MrRCSound unit in my Art-Tech AT-6.
Below is a video of the sound unit in the Texan...
Further AT-6 Mods and Thoughts
One other thing I did was to improve the airflow through the cockpit, largely because of the sound unit.
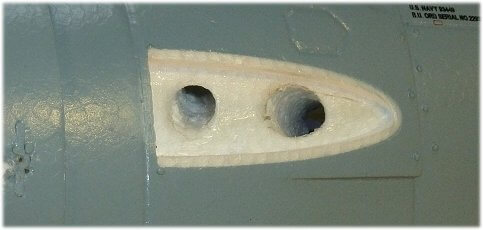
As sold, the Art-Tech AT-6 has small holes in the radial engine moulding, and the lower air intake (beneath the nose) does bring air into the fuselage. But that didn't seem enough to me, so I removed the side intake and made two holes through the foam into the battery compartment. Cork boring tools are perfect for this job, and the holes are going to make a big difference to the cooling.
An additional job was to make an exit hole for the air, and I did this by cutting out the very rear window of the canopy.
After cutting the holes, I simply epoxied the air intake cover back in place.
Overall, I really like this plane. As I said at the start of this page, it's a refreshing change from the normal warbird line up, and in a very attractive colour scheme. It flies well so long as you treat it with the respect it deserves, and keep that nasty stall fresh in your mind!
The optional retracts are a must, and if you can stretch the budget a bit then go for a sound unit too.
Quality is to be expected for a Chinese foamie. It's not brilliant, but not bad. The aileron servo failing on me was a big issue and a sad reflection on the potential quality issues this type of plane can suffer, but the attention to detail on the AT-6 is very good.
By far the most annoying thing for me is the yellow paint flaking off; you only need to breathe on the plane from the wrong direction and it comes off. But, for the money paid it really is a nice electric foamie.
I know that other Art-Tech AT-6 owners have upgraded the motor, but at the moment I haven't found this necessary. But, at the time of writing this page I haven't flown the plane with the sound unit fitted and so the additional 7oz or so might make me put a better motor in it, although I don't think it will be necessary.
Art-Tech AT-6 Final Notes- 2022
As stated at the start of this review, the Art-Tech AT-6 Texan has long been discontinued, and I don't think the manufacturer is in business any more.
I did end up upgrading the motor, as the extra weight of the sound unit did make a difference to performance with the stock motor.
Ultimately my Texan, featured here in this review, died when it suffered a radio glitch at the top of a reverse Cuban maneuver. For reasons unknown, the radio link failed and I could do nothing but watch it dive into the field from about 100 feet up.
As you can imagine, it wasn't repairable!
Related Pages


All of this and much more is covered in our Beginner’s Guide 👇
The Beginner’s Guide To Flying RC Airplanes is a 139-page, easy-to-read e-book written for complete newcomers. It explains exactly what to buy, where to fly, and how to avoid costly mistakes.
📖 Start reading now