

RC Glider Fiberglass Fuselage Repair - How To
How do you do a fiberglass fuselage repair? Being in to rc gliders, I have a few moulded fiberglass/GRP (GRP: glass-reinforced plastic) fuselages and a little while ago I had my first serious crash with one, my FlyFly Freebird.
Actually it wasn't too serious but bad enough to crack the fuselage and rip out the wing root ribs - my fault completely, just bad flying and coming out of the lift zone of the slope.
Now, I've done my fair share of balsa/ply and foam repairs to various planes and gliders over the years, but a fiberglass fuselage repair was new to me, so after some asking and reading around I came up with what seems to be a common game plan, and here it is...
Step 1: Assess the damage. Spend some time checking the fuselage and be clear of the extent of the damaged area, make sure you know how bad it is before you start! It might be that it's not worth repairing.
Below are a couple of photos of my cracked and split Freebird fuselage:


Step 2: If you're happy that it can be repaired, make sure that the fuselage can be realigned to its original form. Fiberglass isn't too flexible if there are no external forces applied, so hopefully the fuselage will still be retaining its original shape, despite the damage.
With very careful use of some thin, good quality CA (cyanoacrylate) adhesive, hold the fuselage together and apply the CA to the broken and exposed areas of the fiberglass.
The CA needs to be thin so it can 'wick' into the glass cloth. Apply CA to all the areas of damage that you can, this will hold the fuselage together well enough for you to work on it without it distorting:

Step 3: Completely mask over the open areas of the fuselage (wing seat & canopy area). There's going to be a lot of sanding and you don't want dust getting in there. Personally I left the radio gear in the fuselage during the repair, so the need for careful masking was even greater:

Step 4: This is where the fun starts! Ideally you need a 'Dremel' type multi-tool with a small sanding drum - you need to sand back the gel coat around the damage. Don't go too deep though, you just want to get back to the fiberglass and reduce the thickness of the fuselage where you're going to make the repair:

Step 5: Once sanded back, clean the area with White Spirit or turpentine, making sure you remove all the dust from the fuselage. Cut strips of glass cloth (I used 2oz glass cloth); how wide you cut the strips will depend on the size of your fiberglass fuselage. You can also cut squares and rectangles, but the idea is to build up layers with a number of pieces of glass cloth, rather than try to make the repair with one piece.
Carefully apply each piece and coat them thoroughly with the 2-part epoxy. Just keep adding the strips until you're happy, but don't go too mad - don't let the thickness of new glass cloth and epoxy exceed the thickness of the surrounding, undamaged fuselage:


Step 6: Once the epoxy has cured (usually the next day), sand the repaired area of the fuselage so all is smooth. You'll need to start with some fairly coarse grade sandpaper, I used 100 grit and then 150 grit. Take your time here, there's no point rushing...

Step 7: It's unlikely that you've got a perfectly flat surface after all that sanding, so you need to do some filling. Ideally you want fine 'surface/scratch filler' and 2-part car filler is good for the job. Apply sparingly and make sure you fill all the dips in the repaired area. Fill proud so you can sand back:

Step 8: Once the filler has cured, it's time for more sanding! As before, take your time and sand the filler back to a smooth surface to match the original fuselage. If there are still dips after you've sanded, re-fill them and re-sand until the surface is as good as the rest of the fuselage:

Step 9: When you're happy with the sanded fuselage, it's time to get out the paint. Clean the repaired area thoroughly with White Spirit and be sure it's completely dust free. Use spray paint and give the area a couple of coats of primer before the top coat. Car paint will do the job but I used acrylic hobby paint because that's what I had lying around.
If you're new to using spray paint, be aware that the overspray gets everywhere so do it in a safe place and cover up the surrounding areas with old sheets or paper. Apply the paint in several thin coats, don't try and do it all in one coat. If in doubt, practice spray painting on some paper first.

That's about it! Making a repair to a fiberglass fuselage might seem daunting at first but, as I found out, it's actually easier than a traditional balsa/ply repair - depending on the damage involved, of course.
If you have any 'mouldies' then don't be afraid of crashing - a fiberglass fuselage repair isn't half as nasty as you might think!
Related Pages

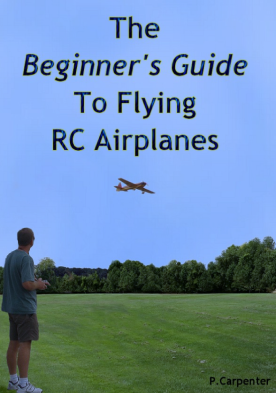
All of this and much more is covered in our Beginner’s Guide 👇
The Beginner’s Guide To Flying RC Airplanes is a 139-page, easy-to-read e-book written for complete newcomers. It explains exactly what to buy, where to fly, and how to avoid costly mistakes.
📖 Start reading now