RC Graupner Swift S-1
This is a bit of info on my Graupner Swift S-1 rc glider. It's the 2.1m wingspan version of the famous Swift S-1 aerobatic sailplane which was developed in the early 1990s from the Polish SZD-21 Kobuz sailplane, and the Swift S-1 is a popular scale aerobatic glider for radio control enthusiasts.
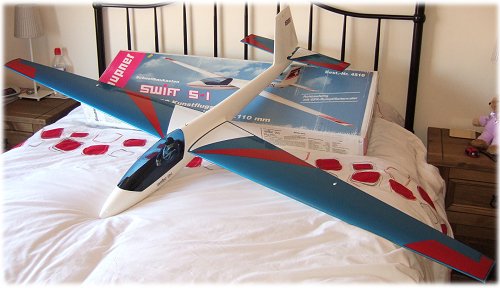
The Graupner Swift features a GRP fuselage (and fin) and foam core/veneer wing panels with balsa sheet tailplane, so is a relatively simple build.
I settled on the Swift after shopping around for a 2 meter (or thereabouts) wingspan aerobatic glider to compliment my collection of smaller gliders. Fortunately for me there was an rc plane and glider shop close to home and the Graupner Swift caught my eye; it was sat on the top shelf and judging by the layer of dust on the box had been there for quite some time!
I duly parted with my money, took the glider home and got to work.
There's really not a great deal to do to assemble the Graupner Swift S-1 and mine took a few evenings to complete. The plan, or rather instruction sheet, is a good reference but it had its faults and the kit had some minor issues along the way. But overall it's a good quality rc sailplane that anyone with some intermediate modelling experience can throw together.
My choice of servos for my Graupner Swift S-1 was the Spektrum DS821 standard servos for elevator and rudder control, and HiTech HS-85M metal geared ones for each aileron.
The aileron servos require an extension lead which I soldered to be sure. Installation of the HS-85Ms into each wing was fairly straightforward, the plan calls for standard servos to be used but it's really not necessary with today's choice of high power micro ones.
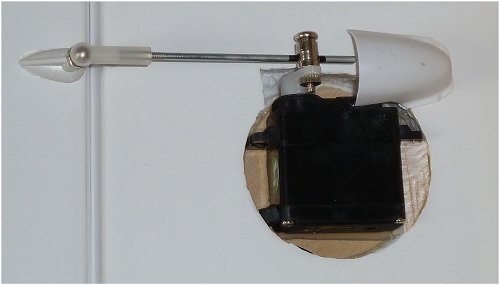
Above: HiTech HS-85M servos power the Swift's ailerons.
Servo covers are supplied, but don't work too well.
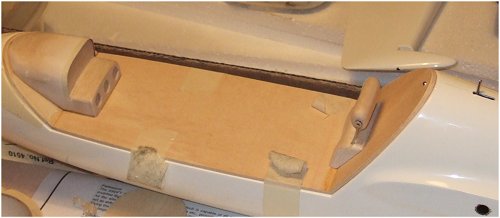
Installation of the two standard servos in the nose is easy; a 1/8" ply plate is supplied and needs to be cut to shape before being glued into the glider canopy area. But before this needs to be done there are two ply fuselage formers which must be glued into place fore and aft of the wing seat area. This was easier said than done and proved to be a bit tricky - don't use quick-setting glue for that little job!
Once those formers are in place you can then concentrate on the ply canopy plate, I used Gorilla Glue on all the ply/GRP joints which secured everything very well.
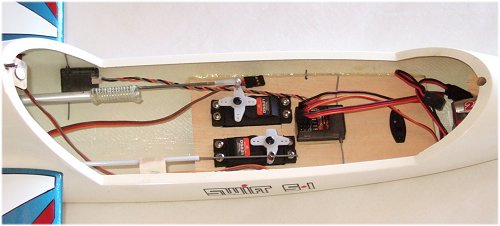
Above: radio installation in the Swift S-1 is not complicated.
Servo linkage on the Graupner Swift is a mixture of Bowden cable (plastic outer/metal inner) for the rudder, wire rods for the ailerons and a relatively large diameter aluminium tube for the elevator. Quite why Graupner chose this latter one is beyond me, but I stuck with it and made up the control rod with the tube and a length of medium gauge wire rod bound and epoxied to each end, the rod being threaded on one end to take the plastic socket that locates on to the servo ball joint. The ball and socket connections (as opposed to a standard clevis type) on all servos except rudder make for strong and secure linkages between servos and control surfaces.
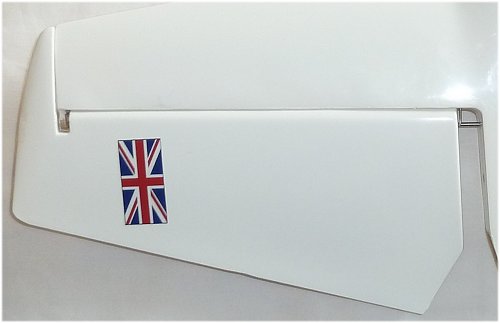
The rudder completion was a bit fiddly; on the Graupner Swift S-1 the rudder isn't hinged in the conventional way but instead is vertically pinned at the top and bottom. The servo linkage isn't anything other than the metal inner wire of the Bowden cable bent 90 degrees to enter the bottom of the rudder, offset from centre, and glued in place. The curved leading edge of the rudder fits inside the back 1/4" or so of the hollow fin, the whole thing works very well.
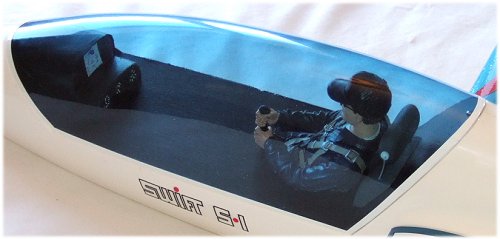
The large canopy of the Graupner Swift S-1 just lends itself to some scale detailing; a couple of images found on the internet gave me an approximate idea of how to make the cockpit look so I crafted a balsa instrument panel and seat back from some scrap (note the canopy release latch in the photo below, far right):
I think the cockpit turned out quite well but sadly I just couldn't find a suitably sized pilot. Reluctantly I settled for the closest I could find but he's too small by far - so I have a malnourished teenager at the controls! But the whole job gives the right impression...
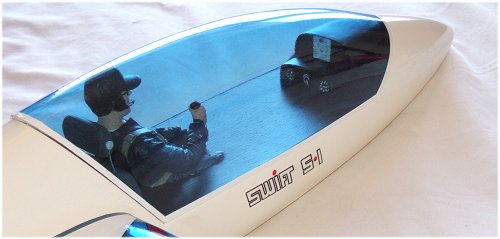
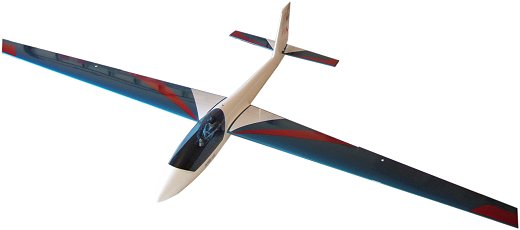
I chose not to go for a scale colour scheme with my Graupner Swift S-1 because I didn't want the standard 'white, white or white?' finish. Instead I opted for blue Solarfilm on the wing and tail upper surface with white below and some red and white Solartrim flashes. It might not represent an actual Swift S-1 but I'm very happy with the overall appearance of my glider!
Graupner Swift S-1 Flight Report
I haven't been able to video the flights I've had this year with my Graupner Swift, but I can say that it is a fantastic glider to fly.
In the right conditions the Swift S-1 will match most aerobatic gliders on the slope, although it won't be the fastest. The 2.1m wingspan is just right for my club slopes.
Roll rate is good although not blistering, and penetration in to wind is average (could be better). The Swift handles all the common maneuvers perfectly well and inverted flight needs only a small amount of down elevator when the glider is correctly balanced.
I've flown my Swift in gusty winds of up to around 30mph and it loves those conditions. Landing has been made easier with the programmed spoilerons but the glider can come in a bit fast sometimes! A bigger rather than smaller landing area is recommended, especially for windier days.
If, one day, I do some major damage to the wings* I will get a new pair made up with flaps. Crow braking on this glider would be verrry welcome, and with hindsight I wish I'd done something about that during the build.
All in all I'm very pleased with this 2.1m Graupner Swift S-1, it flies superbly and is a joy to throw around the sky!
* Well that major damage came in November 2013. Actually it wasn't major, but I lost the outer 20cm of the port wing in a mid-air with a very expensive mouldie (nobody's fault, just one of those things). Fortunately the mouldie was unscathed.
So I now have a new pair of wings with flaps, and what a difference. With crow braking the Swift can be brought in very slowly, and is now so much easier to land. I also have an aileron to flap mix programmed in, so the wings have full span ailerons to improve the roll rate.
A huge improvement, thanks to a mid-air collision!
